Oops.. I have not been blogging much!
Ok guys sorry, life has a funny way of getting in the way of the things we all need or want to do! I want to blog, but I am not a daily blogger by any means. I work and I need play time and I have a bit of a social life.. so the blog gets set aside for a bit!
Well it seems that gas prices are still rising... May being the month that usually happens..
Gas has gone above$4.20 a gallon again. Thankfully it has not gone to $5.00 a gallon yet. But with the increase in gas prices we are all under a financial crunch. Everything costs more because or rising fuel costs.
We all need to find ways to conserve gasoline and not rely on the pump so much, if at all possible!
My old truck has recently been doing very poorly on fuel due to a leak in the throttle body... ugh.. so I opted to get a newer car instead of just putting more money into my old tank.. I am now getting almost 40 miles to the gallon as opposed to the 25 my truck averages, and lately that has dropped to below 20 due to that fuel leak.. it's that bad if not worse. You can just turn on the key and the fuel almost pours out of the throttle body.. so I figure this payment I have now will basically be taken care of by the savings in gas that I will have each month!
What you say I cannot save my car payment in fuel each month? Of course I can! I drive a lot, for recreation and for work of course.. I just got this new car on the 8th and have put 1100 miles on it.. and I have not been going to work at all.. Once work starts up, I will not be spending as much on pleasure driving, but the miles still add up and I still will be getting almost 1/3 of my money back in fuel savings! Here's an example.. take my miles this month.. If I was driving my truck1100 miles at 25 miles per gallon = 44 gallons * $4.25 = $187. My new Nissan Versa 1100 miles / 40 miles per gallon = 27.5 gallons * $4.25 = $117. That's a $70 savings.. I can fill up my new car on that savings almost twice.. since the tank is only 11 gallons!
So I figure at this rate I will save in fuel costs about half of my payment each month, if not a bit more. I think I can handle that! Plus I pollute less due to the better gas mileage. I can even run the AC and it gets this amount of miles per gallon.. my truck has no active AC and it also sucks the fuel up...
If you drive a lot and have a vehicle that gets poor mileage, you should seriously think about getting something more economical. Yes, I know that Hummer is your status symbol, but that doesn't mean you can't have a Yaris or something small to drive to work and back.. Our oil will not last forever... it is a limited resource.. it WILL RUN OUT one day.. at the rate we are going, we may all see that happen sooner than we think.. Then what will you do? You sure won't need that Hummer anymore...
Thursday, May 24, 2012
Sunday, January 29, 2012
Saving Money On Gasoline

- Image via Wikipedia
Today I wanted to kind of diverge into a different area of interest of mine. Trying to get the best mileage out of my vehicle as I possibly can! I wanted to share with you some fuel saving tips that I have learned lately. We all know OIL is big business. I, for one, want to give them as little of my money as possible! We all know that gas prices are insanely high and the oil corporations are making ridiculously high profits. So the more you can save on your gas and take more from these mega-corporations, the better!
There are a lot of things you can do to reduce your fuel costs. Most of them are minor and will save you just tenths of pennies, but after a while it adds up. Others save you a bit more, maybe into the pennies or even dollars. Do not undervalue the saving of a penny!
I like to get the best mileage I can out of my vehicle, so I try my best to do these things. As I find more ways to save, I find that I must share them with everyone! I want to get the word out to as many people as I can!
Filling your tank!
We all seem to search out the lowest prices we can get on our favorite gasoline, but did you know the time of day and how fast you pump matters too? That's right, most of us don't think about it, we just fill up when we are empty! Here are a few tips to get the most from your fuel purchase!
Fill up in the morning. Gasoline evaporates at a low temperature, therefore is more dense when it is cooler. You will get more gasoline into your tank if you fill it up in the cooler morning temperatures, as opposed to the heat of the day. The colder the fuel is the more dense it is. So filling up in the morning is the best time to do so. A gallon of gas weighs more at 0°C (32°F) than it does at 20°C (68°F) . You get more fuel when the fuel is coldest. Although the tanks are underground and insulated, like a thermos, the temperature is fairly constant day to day, after each truckload of fuel the temperature can change depending on the temp of the fuel in the truck though. The real difference though will be in the fuel that is in the pipes and hose outside the tank, which can be a few gallons of gas depending on how far the gas has to travel from the tank to the pump you are using! I believe this to be the case just because the pipes and the pumps are closer to the surface and will have temperature fluctuations. Also, there has to be a pipe leading to all the pumps in the system so it stands to reason that the further away a pump is from a tank the more temperature fluctuations there will be in that part of the system.
Pump your gas slowly! For the same reason you want to fill up your car in the morning, you also want to pump it as slow as possible. You want to keep the fuel from being vaporized as you pump it. The new pumps have the nozzles that pull the vapors off for a reason, they go right back into the underground tanks! So the slower you pump, the less vapor is created and the more gas you will have in your tank, instead of theirs. It's minuscule savings of vaporized gasoline, but still important to know that it can make a difference over time! This savings may not be worth the time to pump so slowly! That's up to you and your schedule and if you are serious or not about saving any amount you can, no matter how small!
Keep your tank above 1/2 full. Fill up your tank when it gets to 1/2! Yes that's right! Don't wait for it to get to empty! Although people will argue about the weight of the fuel being an issue, it's really not that much weight. A gallon of gasoline weighs about 6 lbs. So even if you have an older car with one of those massive 22 gallon tanks, you are only talking about 132 lbs. Do you really think that 132 lbs is anything to your cars mileage? I think not! That's just like adding one more average sized person to your car. Except that the tank will lose weigh as you drive and the person will not!
Ok, so the reason to fill your tank up at the half way point is to prevent condensation, not reduce vaporization of the gasoline! Your vehicle should have a vapor recovery system so any vapors produced are usually recirculated back into your tank or consumed when your engine is running. WATER forming from condensation and mixing with your gas, can be a problem... Water in your fuel makes it break down faster and reduces it's volatility, which can give you less energy out of the fuel.
Buy the CHEAP gas! For those of you that think that ARCO is not as good as Chevron or Shell, go ahead and keep on paying the higher prices. Chevron adds "Techron" to their gas, and Shell adds that "V-power" only to their premium fuel. The additives are not necessary for your car to run or stay clean inside! If you are worried about it, you can buy a fuel additive, like Techron, at the local auto parts store that you add to your car every 5000 or so miles. You might pay $5 for the bottle for those 5000 miles, but you will pay more if you get it in your gas. Arco in my area lately has been about $3.599 a gallon. Chevron, Shell and some others have been in around the $3.759 range! That's $0.16 difference per gallon! So for every 10 gallons you pay $1.60 more. Not bad.. but how many miles do you get on that tank? If you drive a Hybrid you might be getting a nice 40 miles per gallon... so let's call that 400 miles for those 10 gallons! Most cars won't get this great mileage and will get fewer miles for the 10 gallons, and so will cost more! At 4000 miles you are at $16.00 difference and another 1000 miles adds another $4.00! So you are paying $20 dollars extra per 5000 miles to have it put in your fuel, when you can save $15.00 by going to the store, buying the additive and pouring it into your tank when you fill up.
Over the years, there have been so many news reports talking about gasoline being the same quality at every station, just differing in octanes that I am convince the brand doesn't matter, it's all hype! I've seen no name brand tankers at name brand gas stations pumping fuel into their tanks so I am not a fan of the name brands. I doubt it really matters at all. Octane matters, brands don't, the brands just use marketing ploys to say they are better in some obscure way. Buy the cheap stuff and save yourself some cash! If your buy the cheap gas and your car runs badly try a different station or increase the octane rating of the fuel you are buying. It's important that you use the correct octane or higher for your vehicle! To find the right octane gas value for your vehicle, look in your owners manual for your vehicle.
Use CASH! You remember that green paper stuff, don't you? Don't pay interest on your gas by using a credit card! Don't pay a debit card fee either! Use cash and avoid this extra charge!
Debit card stations usually charge a fee to use the card. Arco has been charging a debit card fee over the past years that I can remember has gone from 25 cents to 65 cents now! If you use your debit card at any station that has an added fee, you are paying a hefty increase in your gas price. At 65 cents a tank full you are paying at least 3.25 cents more a gallon - assuming you have a 20 gallon tank and it's empty. Most cars have small tanks, 10 - 16 gallons in size, and if you have one have say a 10 gallon tank, you will pay 6.5 cents more a gallon to fill it up when it is BONE DRY! Pay attention to that added charge and how much it's adding to your per gallon prices.
Credit cards are probably even worse to use. Especially if you have a balance. Obviously rates vary and some of us get great rates, but if you don't pay it off each month you are paying interest on items your bought a while ago and continue to do so EVERY month! This is an endless circle and the topic for another day. If you want to continue to pay for that tank of gas over and over and over, then keep using your credit card to pay for it!
Cash is the best policy! Once it's spent, it's gone and you get the product you purchased, so there is no overspending. No additional or ongoing fees or interest to pay.
When not to buy fuel! The worst time to get your fuel is when the tanker is filling the tanks or has just left. The reason is the sediment in the tank that sits in the bottom of the tank, normally, has now been stirred up and can get into your tank! This can clog your fuel filter and cause other issues in your fuel system.
If you do see a truck refilling the tanks at a station, go to another station or risk getting the debris from the bottom of the tank into your vehicle's tank! I suggest you just move on to another station, or wait a few hours to let the new fuel settle down and let that sediment to go back to the bottom of the station's tank.
The gas station tanks should have filters, but who changes them and how often do they need or get changed? You may never have a problem with dirt in your fuel if the station and your vehicle fuel filter are in good working order. But, if you have a vehicle like mine, the fuel filter is almost impossible to get to, and it takes some real effort to get it changed. (I guess the old days of having the fuel filter in your car, near the firewall, are gone) Why would I want to take the chance of clogging it up if the stations filters are not maintained properly? This will just cost me way more money. Best to just avoid the situation when the fuel tanker is there and not have to worry about the filter system being maintained properly at the station.
Try using some or all of these tips and see if you see a difference in the amount your spending on fuel over the next few months or longer. Depending on how many miles you drive a year the savings could be nothing or something substantial.
This ends part one of my mini series on Saving Money on Gasoline.
Friday, September 23, 2011
Toothpaste
Toothpaste!
Hi everyone, all like 5 of you that follow my blog, thank you! Haha! I guess if I wrote daily it might be more interesting..... so we will keep it like it is.. boring!
Ok first thing I want to say about toothpaste is USE IT!
I make my own of course! I will be sharing my recipe in this post!
Now you can buy and use whatever you like, but I recommend that you don't use one with fluoride, since that is a deadly toxin and well the kids don't need to be overdosed on that! If you can get it out of your water supply, I would recommend that too! It's just a chemical that is from fertilizer run off and aluminum production plants... of course there is some natural fluoride in the soil, but the kind in your toothpaste probably isn't that kind! Yuck!
Keep using it if you like, but I would research it for myself if I were you!
Now to save you some money on whatever toothpaste you use! Here are my tips!
Now if you are like me and you watch a lot of TV commercials you will notice that we are basically brainwashed into loading up our toothbrush with a nice huge curly swirl of the stuff! It's what we all know as the way to brush!
And most of us know that when you do that, and you go to start brushing a lot of it just falls into the sink! LOL! Making a nice mess for whoever gets to clean the sink next!
Well, surprise, that's a way to get you to use more than you need! You only need to put an amount on your toothbrush that is around the size of a pea! That's probably about 10 times less than you currently are using! So if you want to save, just cut down on the amount of toothpaste you use on your brush! it will still lather up and get your mouth nice and clean, considering there are other nice chemicals in there to give you the illusion that it's working for you! You really are better off without all that extra stuff in your body!
Now back in the day before toothpaste was actually created and marketed like crazy, people used something simple and cheap... Baking soda! Yes, it's a wonderful, safe and very versatile chemical. It's actually a salt. So this brings us to the toothpaste recipe I use for my daily use!
Funny thing is I have been using this for over a year now, and so when I have to use something mainstream out of a tube, well it tastes like I am washing my mouth out with soap... I probably need that cause I do use foul language a bit too much! haha!
Ok so it's real simple, you need the following ingredients:
2 Tbls Extra Virgin Coconut Oil
3 Tbls Baking Soda
3 - 4 packets of Stevia in the Raw, or if you have a Stevia plant, grind up a few leaves.
A few drops of Peppermint oil or Tea Tree Oil (to taste)
INSTRUCTIONS:
Place the Coconut oil into a glass container with a lid.
I recommend getting the Coconut oil warmed up by stirring it a little bit in the jar so it can get soft, it only needs to get to 78 degrees before it will be in a liquid state if you coconut oil is solid!
Add in the baking soda and stir carefully, it tends to want to jump out of the jar I use.
Combine thoroughly, then add in the Stevia and stir.
I taste it at this point in case I want to sweeten it more. But I have made it so much, this seems to be perfect with 4 packets for me!
Add in peppermint oil, or whatever flavored oil you prefer, by drops.. stir and taste test after every 5 drops.. I just kind of dump in about a 1/2 teaspoon of it! haha!
That's it! Keep it covered so nothing gets in it! Haha! Be kind of nasty to have a fly in your ointment.. lol anyhow, try it for a few days. It will take some getting used to, you will not like the texture I am sure at first.. but after a few weeks you will not want to go back to your old toothpaste. I like it. I recommend you gargle with Hydrogen Peroxide too instead of using something like Listerine or some other alcohol based mouthwash.
Please feel free to comment on anything I have said! I take criticism.. good or bad... so bring it!
I mix this up in a little jar that has a plastic removable cover so I can dip my brush into it and use it anytime I want..
Sunday, August 7, 2011
Laundry Detergent!
Laundry Detergent!
Wow, I just noticed I didn't put my recipe for laundry detergent into my blog yet! Well here goes:
If you have read my blog from the beginning, then you might have the products that I mention in my ingredients listing for simple laundry detergent that works and costs WAY LESS to use than the store bought stuff!
This detergent works in High Efficiency machines! My sister uses it in hers, and is always asking me for more! So I gave her a full 2.5 gallon batch the last time so I won't have to make it so often. Usually I split a batch between us and with her having two little boys she uses it a lot faster than I do! I guess I would too if my kids still played in the dirt and mud! haha!
So to make this detergent is easy. Takes me about 15 minutes from start to finish.
INGREDIENTS:
1/3 bar of Fels-Naptha
1 Cup of Borax
1 Cup of Washing Soda
2.5 Gallons of water, seperated.
Large Bucket
Cover for bucket.
2 - 3 Empty gallon juice/milk containers, something with a screw on lid.
Funnel
That's all you need! Cost is about a buck!
INSTRUCTIONS:
1) Bring 1/2 gallon of the water to a boil!
2) You can either cut the Fels-Naptha into thirds, or just mark it at about the 1/3 point... doesn't have to be exact. Then take a cheese grater, and grind it into dust. If you want to try to do in a food processor well i suggest you cut it into small chunks. I use my 4 sided cheese grater, and use the side that has all those bumpy things on the side... Usually it has 4 cuts it can make, one side is like a big cheese slice, then another is for large shredded, then smaller fine shredding and then the side I would never use on cheese.. that is the side you want to use... but you can use the Fine Grate too if you like!
3) When the water comes to a boil, dump the Fels-Naptha into the water and stir until dissolved.
4) Turn off the heat
5) Add 1 cup of Borax, stir until dissolved.
6) Add 1 Cup of Washing Soda, stir until dissolved.
7) Pour into a large bucket, I use a 5 gallon bucket from Home Depot. Add the other two gallons of water and stir for about a minute to mix thoroughly.
8) Cover the bucket (or other container) with a lid or plastic wrap or even a towel, just to keep dirt and stuff out of it.
9) Let it sit overnight or until it gels.
10) In the morning or later in the day, you will take the cover off and notice that the mix is either gelled up or is the consistency of Egg Drop Soup, it actually can look just like that. Stir it thoroughly. Use a funnel and bottle it into a few gallon jugs.
Makes about 2.5 gallons of Laundry Detergent.
Use 1/2 to 1 cup of soap in your washer per load. This soap is LOW SUDSING, so can be used in HIGH EFFICIENCY washers. 2.5 gallons / 1/2 cup = 80 loads.. for the price of about a buck! Tell me where you can get that at the store?
A bar of Fels-Naptha is around 98 cents at Walmart or WinCo, 3 bucks at a regular store!
A box of Borax is about 3 bucks, and well you only use a cup for each batch, I think you get about 8 cups or more from a box. Same with the Washing Soda, a box is about $2.50...
Water is whatever it costs you per gallon!
Try it, even as an experiment it doesn't cost much at all!
Please let me know if it works for you or not!
Recycled Oil!
Hey Everyone!
I wanted to say OOPS! I forgot to combine my last two blog entries like I meant to do, I must have gotten busy or something! Sorry about that!
My whole thought with the recycling and the oil usage was supposed to lead to RECYCLED OIL!
If you get your oil changed at a shop, well they do this for you! No brainer!
If you change your own oil, well don't be one of those jerks that dumps it down the sewer! Shame on you if you do! Our environment is really messed up as it is! Take that oil to your local auto parts store, most of them have a recycle program... in other words you drop it off for FREE and they make money on it selling it to some recycler!
Now what's funny is after my blog about your oil being able to last longer than those 3000 miles that they get everyone thinking is the breaking point.. out comes MOTOR OIL, by Valvoline - I believe, that is 50% RECYCLED! What's that tell you?? Make your own judgement there! They filter it and of course probably treat it to make it less black, but if the viscocity is so broken down after being in your motor, how the hell does it get to go back in with new oil and be reused! Just kinda confirms my point that the oil companies and all these lube joints are just ripping us all off on a grand scale... and they still keep the prices as high as the economy can afford...
We really need to hit them where it hurts if we can. Stop paying for an oil change every 3000 miles, look at your operation manual and see what they recommend, not what they say on commercials! This is how America continues to get duped by the big corps and our corrupted government!
Tuesday, April 19, 2011
RECYCLE
Recycling!!!
Ok we all talk about being GREEN these days, but how many people actually are doing it? Not enough if you ask me!
My town has a recycling program where they take paper, plastic, glass, metals, and whatever else can be renewed... but they also have things that can't be taken by them and those items should just be thrown in the trash.. unfortunately.. but maybe some day they will build more power plants that work off of trash.
If you are like every other American in the US, then you use and can recycle a ton (literally) of stuff of more a year!
Ok I use my town's recycling program, but I do NOT give them my aluminum cans, my glass bottles, or my plastic bottles! Those I take to a recycling center and get money for them! If I gave them to the city, well they would make the money and not ME! LOL! So, yeah it can be a pain to separate and store all the cans and bottles and paper, but if you do then you can really make some extra cash for yourself and make it worth your time!
PAPER AND CARDBOARD!
I don't recycle paper and cardboard myself, I let the town do that, cause I don't buy the newspaper and since I have a mobilehome with no garage, I really don't have the space for paper and cardboard storage. If I did get the paper then I would surely save them cause they add up fast! They are paying very well these days for cardboard and newsprint! So if you have the space collect all your boxes, and news papers that you use!
ALUMINUM!
Ok I am not talking about recycling your pots and pans or mail box here... lol I am talking aluminum cans and those new fancy bottles that beer comes in these days! Most of us have soda cans and beer cans galore, most of us throw them out of the car, or in the garbage! But you should be saving and recycling those! Aluminum cans here in California (with the CRV - California Redemption Value) are going for $2.00 plus a pound right now! I think a pound of cans is like 19 - 12oz cans.. so the weight adds up fast.. The price is probably lower in some states that don't have this added tax, but if you do live where they tax your for each drink that you buy then you should be recycling if for no other reason than to get your tax money back! I always like it when I find cans that are on the ground, cause someone else just paid me to take it in for them! Thanks whoever you are!
PLASTIC!
Now don't think that you are going to take in a kids picnic table and get anything for it, that should go to the town recycling program.. I think.. if it's questionable I usually send it to the town recycling and let them figure it out.. I know, I''m a bad boy! But I would rather not take the chance that it is usable rather than put in a landfill where I know it will be for centuries! So, plastic bottles! We all buy water and soda and other drinks in plastic these days, why not get some money back for it?? We also have that CRV tax on the plastic we buy here in California, so I am gonna get as much of that back as I can. Plastic bottle get about $1.00 a pound here, which is less than the aluminum but still worth taking in to recycle! So many of us throw these away, and that plastic will just sit in the dump for eons before it breaks down.. it doesn't turn back into the oil it was made from, so please take them in! I actually think plastic lasts longer in the ground than a metal! So get those bottles recycled!
GLASS!
Everything tastes better out of glass! Take a beer for instance, a canned beer tastes like the metal it's in.. and a beer in glass just tastes fresh! Ok, so glass is a big issue with people and recycling, cause it weighs so much! Heavy to transport and you risk getting cut if anything breaks... but you are doing the planet a favor. Most of us don't buy glass bottles, except beer drinkers I suppose.. well again you pay that CRV here in California, so why not get it back? At least take in the bottles that you paid the tax on, give the rest and any jars that food came in to the town recycling program like I do! I never have that much glass so it's easy to just stick in a milk crate and take in when I take in the plastic and aluminum. It adds to my total, and getting rid of it frequently avoids having to lug a huge trashcan full of bottles onto the back of my truck.. no need to wait till you have a ton of glass, take in 20 or 30 lbs at a time, that's probably two bottles for each pound (not sure about that, but they are heavy enough). Just do it!
If we all recycled, even a little it would help!
If you are not one to recycle, then let someone else do it for you.. give it away to those that will recycle! Like the local homeless guy that probably would love you to death if you gave him a bag of cans. Or put it in a container that is labeled for recycling, like the ones from the city recycling programs or one you might see at the mall or sports center. Or ask someone near you if they recycle, give it to them..
Do your part to save our planet... don't put your recyclables in the Earth!
OIL!!!
OIL!
Yes today's subject is how to save on oil! I am talking about oil for your car, not for cooking! Although most of my latest blogs have been about cooking and will continue, I thought that a lot of people play into a lot of hype when it comes to your oil in your car!
Let me digress! Ok Saving on cooking oil is easy enough! Get a PUMP! I have one of these marvelous little pumps.. you can put a little olive oil or veggie oil in this thing, pump it up and then spray... Saves you from buying cans of overpriced spray from the stores.. and probably save you a ton the cost of it in a few short months! I'm probably not supposed to promote the products that I use in my blog, but I love this thing! My sister got me one and I can't live without it.. My cans of spray just sit there now!! I guess I should use them up and toss them to make room for more spices and things that I have been collecting.. lol
Ok back to motor oil! The problem with oil is that we can't live without it, but we can reduce our consumption of it a lot, especially in our own cars! Ok as everyone knows, cause you are browbeaten by advertisers to think that it's true, you are supposedly supposed to change your oil every 3000 miles or 3 months.. Well I gotta tell ya you are wasting your money if you follow this line of BS!
Take a look at your operators manual for your car, and look at the maintenance schedule! You will find when the manufacturer actually says to change your oil is a lot longer than 3000 miles. Check it for yourself! Now the best thing to do for reference is too actually look at some older model cars, it will say that you can go almost 15000 miles before that change, or with heavy driving, you might only get 7500.. this was the recommendation that my 1987 Nissan Sentra used.. I changed my oil about every 10000 miles and the car went 298000 miles before I messed it up by stripping out the crankshaft bolt.. otherwise I would probably still own the car and it would have many more miles on it today! Just saying check your stats!
Yeah oil turns black.. yeah it "breaks down" but only to a certain point... Now I have a story about a 1973 Mercedes 200 that I used to own.. I was living in Germany at the time, so if you try to find this model it doesn't exist in the USA. Anyhow, my story goes like this! Mercedes in all their greed made the drain plug need some special huge allen wrench to get it out.. well I didn't have this tool... the oil was black when I got the car.. I wanted to change it, but being married, on the economy, and with a kid on a military salary back then, well we needed to eat more than the car needed an oil change.. So basically I have no idea how old that oil was, but I checked it frequently, and drove that car everywhere I could on my days off.. adding oil maybe once when it was low.. but I don't even remember doing that... so I drove that car for almost a year, before it ceased up... why did it cease? Oh cause the radiator sprung a leak in the cap, and the wonderful friend that was driving it didn't know that when the temperature needle on the water temperature gauge goes off the dial... that you don't keep on driving it on the autobahn! So after all the water left.. and this will happen if you are as stupid as this chick was.. the oil can only keep the temperature down for so long.. you need that water.. it's probably more important than the oil! LOL!
Oh, and what's this crap about changing it every 3 months? If my car sits in my driveway for 3 months after an oil change why do I need to go get it done again? Did the oil go someplace? Did it turn a funny color? Did it break down in the California sun? NO NO NO NO NO! It's an advertising gimmick to get you to spend your hard earned bucks every three months! Repeat business for the oil change joint you use! So forget that myth.. I mean how long does the oil sit in bottles in some of these places? Do you really buy any oil from a grocery store? If you do, well you're really spending too much! Sometimes you have to buy it from a gas station and we all know how they like to charge 5 bucks a quart.. that's more than a gallon of the best gas you can buy!!!
So forget that 3 month thing.. just go by the miles on your car to determine when to change it! You're a fool if you don't, and you are wasting a lot of money every year!
Ok now for the people that can actually figure out how to change their own oil instead of paying some business 25 bucks and upwards of 150 to change your oil. Unless you are rich, or well off, then hey give your money away..
I find that changing it myself is the easiest thing to do, hardest part is getting to that filter on some cars... that might be worth the money if it's a huge hassle to get to it to, if so then take it in to an oil changing place, but NEVER to the car dealer! Dealers have got to be the most expensive place to get your oil changed.. unless they run specials, but a lot of those specials are for the dealers specific model of car and everyone else gets the normal bending over that we are all accustomed to when visiting the dealer for service!
Go to your local auto parts store, I am sure you know which ones have the best prices, and get your oil there and do it yourself. Oh by the way, the filter does NOT need to be changed at each oil change! Change it every two times or even three or four.. the oil is not that dirty in your car.. and all the filter is catching is metal shavings usually anyhow.. not dirt.. unless you leave your oil fill cap off your car with your hood up in the blowing desert, where the hell is dirt going to come from in a sealed system? Of course it does get dirty, but it will never clog up even if you leave it in for years and years.. it's just another gimmick. I buy my oil at Walmart for 10 bucks for 5 quarts... it works... and just get the right weight.. most oils are the same, nothing fancy in them that you need to keep your car going. So if you think you need a name brand you're wrong!
I guess I should say that if you try any of this stuff, use your brain... don't come back to me and tell me that your car blew up cause of not changing your oil... I am just relating what you CAN do.. and what I think of OIL! Too many people these days want to be stupid and then blame someone else.. I have done this on ALL my cars, except my 2003 Hyundia Santa Fe just cause I had a good job at the time and didn't want to work on that damn thing... but it had 187000 miles on it by 2006 when I gave it up in my bankruptcy! So as you can see I drive A LOT! And I mean A LOT! And nothing has happened to any car of mine due to a lack of changing the oil. In fact my 1985 Toyota Truck that I drive now has 330000 miles on it, and it burns oil.. so sometimes I forget to add it until it is below the dipstick levels to even read it.. can you say 3 quarts low? and I drive it hundreds of miles... last oil change was last year around 289000... but I figure if it burns it I don't need to change it.. I just add new.. and the thing still runs and goes hundreds of miles sometimes in a day for work..
So in summary,
1) You don't need to change your oil as often as 3000 miles, that's a myth and a retailers dream! Check your owner's manual for their recommendation.. and if they say 3000 miles now I will be surprised! I am not talking about what the dealer says is the maintenance schedule, but what your OWNER'S MANUAL says.. take time to read it! The info is towards the back, after the part about learning how to operate all your gizmos! Use the HIGHEST value.... or go in between the normal driving and the hard driving recommendations... There are usually two tables to look at..
2) No need to change your oil every 3 months if you don't drive your car the amount of miles in the manual! Wait for those miles.. the oil isn't going anywhere!
3) You don't need to buy a name brand oil... the stuff Pep Boys used to sell looked like recycled oil just filtered.. worked great in my cars for years.. then Pep Boys pissed me off...so I buy the Walmart brand.. which looks newer! LOL!
4) Use common sense. Make sure your car is maintained. Check ALL your fluids at least monthly, or have a friend do it for you if you don't know how or you're a hot chick that doesn't like to get dirty! haha!
5) Don't fear letting your oil get "old" it will still lube your engine! But do keep the level up to the proper spot! It doesn't have to be to the top of that line, just somewhere in between the low and full marks! Never overfill your oil either.. more is not better.. you can blow a seal.. then you will have engine problems.. funny how that works!
There are many things that are made of oil and oil byproducts, so many that I can't even start on how you can save on those.. but look around.. keep your plastics consumption down, and recycle what you do use.. only 1% of our plastics are recycled, that's pitiful! I do my part, how about doing yours... besides you get paid to save them.. turn them in with your aluminum cans and bottles.. and get a few extra bucks back!
Thursday, February 24, 2011
Ketchup - the number one condiment in the world!
I have found this recipe time and again posted in different places! I have made it twice with store bought tomatoes and with homegrown tomatoes... both were great, but I think I like the homegrown taste better, plus I know how those tomatoes were grown as opposed to the store bought ones from South America! LOL!
I am copying it and pasting it with pics from the article I found it in..
It's a little time consuming, but OMG is it worth every minute!!!!
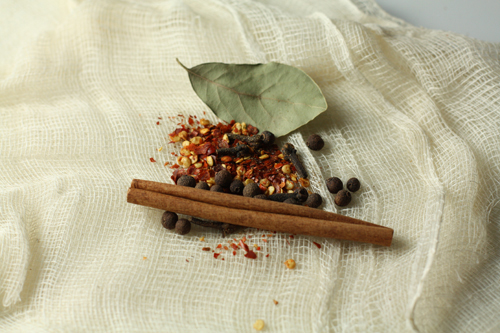
4 whole cloves
1 bay leaf
1 cinnamon stick
¼ teaspoon celery seeds
¼ teaspoon chile flakes
¼ teaspoon whole allspice
2 pounds tomatoes, roughly chopped (I used a 28-ounce can of tomato puree)
1 ½ teaspoons kosher salt
½ cup white vinegar (I used white wine vinegar)
5 tablespoons brown sugar
1 medium onion, chopped
1 anaheim chile, chopped (I couldn’t get my hands on one, so used a poblano chile in its place)
1 clove garlic
Tools: cheesecloth
Method
Wrap cloves, bay leaf, cinnamonm, celery seeds, chile flakes and allspice in a layer of cheesecloth; tie into a bundle and put into a four-quart saucepan over medium-high heat along with tomatoes, salt, vinegar, sugar, onion and Anaheim chile. Smash garlic and add. Cook mixture until onions and chiles are very soft, about 40 minutes, stirring along the way.
Remove spice bundle and puree sauce in a blender or food processor until smooth. (A hand-held immersion blender would work here as well..) Note: Be careful of spattering, as sauce is hot. I used a towel to cover opening of food processor.


I am copying it and pasting it with pics from the article I found it in..
It's a little time consuming, but OMG is it worth every minute!!!!
Ketchup
From the February 2009 issue of Saveur
KOD notes in parentheses
IngredientsFrom the February 2009 issue of Saveur
KOD notes in parentheses
4 whole cloves
1 bay leaf
1 cinnamon stick
¼ teaspoon celery seeds
¼ teaspoon chile flakes
¼ teaspoon whole allspice
2 pounds tomatoes, roughly chopped (I used a 28-ounce can of tomato puree)
1 ½ teaspoons kosher salt
½ cup white vinegar (I used white wine vinegar)
5 tablespoons brown sugar
1 medium onion, chopped
1 anaheim chile, chopped (I couldn’t get my hands on one, so used a poblano chile in its place)
1 clove garlic
Tools: cheesecloth
Method
Wrap cloves, bay leaf, cinnamonm, celery seeds, chile flakes and allspice in a layer of cheesecloth; tie into a bundle and put into a four-quart saucepan over medium-high heat along with tomatoes, salt, vinegar, sugar, onion and Anaheim chile. Smash garlic and add. Cook mixture until onions and chiles are very soft, about 40 minutes, stirring along the way.
Remove spice bundle and puree sauce in a blender or food processor until smooth. (A hand-held immersion blender would work here as well..) Note: Be careful of spattering, as sauce is hot. I used a towel to cover opening of food processor.
Strain sauce through a mesh sieve. Pour strained sauce into a four-quart saucepan over medium heat. Cook, stirring occasionally, until thickened, about 30 minutes. Add more salt, sugar or vinegar, if you like.
Transfer ketchup to a glass jar. Set aside and let cool. Cover with a tight-fitting lid and refrigerate for up to three weeks.
Makes 2- 2 ½ cups.
Homemade Ketchup (adapted from Kim O’Donnel’s version in the Washington Post)
Spices
- 1 bay leaf
- 1 cinnamon stick
- 4 whole cloves
- 1/4 Teaspoon whole allspice
- 1/4 Teaspoon red pepper flakes
- 1/4 Teaspoon celery salt (Kim used celery seeds, but the salt worked for me and I had it on hand.)
- 1 1/2 Teaspoons salt
Other stuff- 1 28 ounce can crushed tomatoes (If you want to use fresh you need about 2 pounds)
- 1/2 Cup white wine vinegar or white vinegar
- 5 Tablespoons brown sugar
- 1 medium onion, chopped
- 1 poblano chile, chopped
- 1 clove garlic, chopped
Put your spices (minus the salt and celery salt, they will just fall through) on a section of cheesecloth and tie it up.
Throw that in your pot with all your other ingredients.
This needs to simmer for 40 minutes. Stir it every 10 minutes or so. All of your veggies should be very tender. Take out your spice package and toss it. Then you need to puree all of the tomatoes and veggies. I only have a small little processor so I had to work in batches. No big deal though.
*NOTE FROM JOE: I used my blender, works fine!
*NOTE FROM JOE: I used my blender, works fine!
Then you need to push all of this through a metal mesh. Most of it will go through if you work it with a spatula, but you’ll be left with about 10% leftover gunk. This gunk is very tasty actually, so you could eat it, but it’s also fine to just toss it. *NOTE FROM JOE - IT IS SO GOOD< SAVE IT AN USE AS A TOPPING ON SOMETHING OR EAT IT PLAIN!!! YUM!!!
You’ll end up with this, ketchup-like liquid!
Put that back on the heat and simmer for about 20-30 minutes until it starts to thicken. At this point you can season to your liking. It might need a bit more vinegar, or sugar, or salt. Then transfer it to your jar and let it cool. You can store it in the fridge in a sealed container for a few weeks without a problem.
It’s awesome with things like potatoes.
Sweet and Spicy Mustard
Ever have a Pastrami Sandwich or a Bratwurst, and wish you had some Deli style mustard, instead of the plan yellow mustard that is in the fridge? Well you can whip this up pretty fast in a blender at home and make enough for a few dogs, or multiply the recipe and make a whole jar of it for everyone to enjoy!
Sweet and Spicy Mustard
Instructions:
Sweet and Spicy Mustard
3 tablespoon of mustard powder
3 tablespoon of sugar
3/4 Cup distilled vinegar
2 tablespoon of flour
2 teaspoon of turmeric
1 tablespoon mustard seed
3 tablespoon of sugar
3/4 Cup distilled vinegar
2 tablespoon of flour
2 teaspoon of turmeric
1 tablespoon mustard seed
Instructions:
All you do is combine everything in the blender and hit puree.. mix it for a few seconds, open the top, scrape the sides and mix again till all the flour and powder is dissolved.
Making your own mustard is really cheap and tastes much better than the store bought ones.
Makes a little over a 3/4 cup of mustard.
You may not like it right out of the blender, but letting it sit in the fridge overnight or a bit longer enhances the taste. If you like something with a bit of spice to it, and a little sweetness then you will love this mustard!
Again using ingredients that you can buy anywhere. You also get a few anti-oxidants from the turmeric used in this recipe.. so you could even say it's better for you that store bought mustard..
Chocolate Sauce - Homemade and tastes great!
I don't know about you, but I enjoy some chocolate sauce on my ice cream! I was talking to someone one day about making chocolate sauce and she said you don't make it you buy it... well I did some research as I always do and found this awesome recipe!
Homemade Chocolate Syrup
Ingredients:
2 Cups of Sugar ( Preferably from Organic)
1 Cup of Unsweetened Cocoa Powder (not dutch processed)
¼ Teaspoon of Salt (Kosher)
1 Cup of Water
3 Teaspoons of Vanilla ( You can reduce this if you like)
Instructions:
- In a 2 quart pot, combine the sugar and cocoa powder, stir together and get all the lumps out.
- Add the salt, then 1 cup of water.
- Mix well.
- Heat to a boil on medium heat.
- Continue to boil until the sauce thickens a bit, about 5 minutes. Stirring to keep it from overflowing.
- Remove from heat.
- Allow to cool to room temperature or around 100°F.
- Add vanilla to taste ( I almost prefer it without any vanilla).
Place into a bottle and refrigerate. (I use a catsup bottle I found at the 99 cent store – comes with a spout, but you can just use an old syrup bottle, that way no one knows it's homemade unless you tell them! LOL!
Keep in the fridge for up to 3 weeks.
Can be used to make Chocolate Milk, ice cream topping, garnish a dessert dish, hot chocolate, pancakes and anywhere else you normally use chocolate syrup!
The cost of this syrup is about half the the store bought stuff and has a much better taste, without High Fructose Corn Syrup (HFCS)
Condiments
Hi Everyone (all three of ya at this point in time.. lol)
I thought I would delve into the land of condiments and want to share some of the recipes I use to make my own Mustard, Ketchup, Mayonnaise, syrups and possibly some other things..
My reason for making my own is a few things... first of all the processed foods you buy have tons of sugar and other things in them like "natural" food coloring.. (did you know one of those "RED" colorings is actually made from crushed beetles?) and since every damn dressing and mayonnaise is made with SOYBEAN OIL these days.. well I decided that I will make my own dressing using something healthier than soybean oil.
Just so you know I am opposed to Soy products, unless they are fermented... there are many reasons for this and you can read about them on the Internet. I try to steer clear of Soy, HFCS, Microwaves, and a few other things that I will probably mention over a span of time.
Ok so today we are going to make something totally sweet!
So let's get started on this section of Condiments with some home made chocolate sauce!
Sorry!!!
Those of you that have been "following" my blog know that I have been kind of lazy about it since June last year! Obviously! LOL !
Well it's time to get started on a new batch of things... I will see what I have posted and what I have not posted. I have one or two items that were ready way back when I was active on this blog, but things happened that took me away from my focus on this.. Hopefully I am back at least monthly!
So here goes... how about starting with something sweet?
Monday, June 14, 2010
Bread & Butter Pickles
Okay everyone, this recipe is found in a video on the FOODNETWORK and it's about making your own pickles! I tried to get a direct link to the video, but no can do, just look for the "IN A PICKLE" video! It's funny, cause well it's Alton Brown's Show GOOD EATS!
So after watching the video you may notice a few things! 1. He doesn't say what kind of pickles are gonna be made. 2. He talks so darn fast if you want to make it you have to watch it about 5 times to get all the stuff written down!
I am posting this blog because I made these and they are awesome! Now to answer the question he didn't answer as to what type, well my title gave it away.. ha ha.. they are Bread and Butter pickles! Great on Hamburgers or by themselves.. which is how I have been scarfing the whole jar full! And of course, I have spent the time to write all those things down that Alton talks about in the video for the ingredients and how to make them!
Let's start by saying these are GOOD! They are tangy! Much more than any store bought ones! I love them! I made two batches at first and am ready to make a few more to give away and also to eat myself.... cause I am running low! They do take at least 24 hours to sit in the fridge before you eat them, and the longer they sit the better they seem to get! Here is what mine look like!

That's a picture of the ones I am snacking on as I write this blog... and actually they are all gone now! LOL! Yum!
Let's get started on making some for you!
What you need:
Ingredients:
2 Cucumbers (size matters here... as two filled two jars for me!)
1 Medium Size Onion ( I used a Valdilia onion)
4 cloves of Garlic - Smashed - easier to get the skin off after you smash it with the side of a knife
1 cup Water
1 cup Apple Cider Vinegar
1/4 cup White Wine Vinegar
1/4 cup of Sugar ( I used Organic Sugar from Cane Juice)
1 Tbsp of Salt
1 Tsp of Pickling Spice ( I bought some of this cause I didn't know I could make it myself.. when I run out I plan to make my own and will post the recipe here!)
1 Tsp Celery Seeds (whole)
1 Tsp Yellow Mustard Seeds (whole)
1/4 Tsp of Turmeric
1 Quart Mason or Kerr Jar
Okay, now what?
Instructions:
In a non reactive pot ( use stainless or glass), pour the water, apple cider vinegar, white wine vinegar, sugar, salt, pickling spice, celery seeds, mustard seeds and turmeric. Stir!
Heat to a boil.
Once the mixture is at a boil, turn down the heat and simmer for 4 minutes. Stir it once in a while.
Take it off the heat and let it sit while you process the vegetables!
Wash all the veggies!
Slice the cucumbers with a knife or mandolin into thin slices.
Chop the onions into round slices and then quarter them to provide julienned pieces..
And smash the garlic cloves with the side of a large carving knife or similar item, peel off the skin.
Then, as in the video, put alternating slices of cucumbers and onions in a 1 quart mason jar or you can use an old pickle jar. I would say make sure it is glass and clean before you put anything into it, including the lid! Once you get about half way up, add two of the cloves of garlic, then continue till you top off the jar, and add the final two cloves close to the top. Don't fill the jar to the top with veggies, you want to have the vinegar cover them so leave a bit of room!
Now take the heated mixture and pour it slowly into the jar until it covers the veggies, then seal the jar and place it in the fridge! Wait 24 to 72 hours before tasting them! Then ENJOY your homemade pickles!
I waited 24 hours and it almost killed me to have to wait that last hour! LOL! Once I tasted them I wanted to share them with the world, but also clarify what Alton Brown left out of his video, and I tried to find the recipe on the site but couldn't so I was obligated to make a note of this great recipe until foodnetwork decides to post it in print.
I think Alton Brown is hilarious, intelligent, explains things clearly and is an awesome chef. I like most of his recipes! So you might see a few more of these later on!
I used store bought regular old veggies here, I would have liked to get organic ones, but my idea was to try it, so I didn't want to waste money on the more expensive and better for you items if the recipe was gonna suck! Ha ha! Next ones will be organic and I bet the taste will be even better! I did not get into the cost of the items, but I am convinced that making my own pickles is the better way to go for taste if not health. Store bought pickles are bound to have preservatives in them, just like most things you buy now. So making them at home, I doubt these last more than a week in your home once you taste them! Assuming you like that Bread and Butter style pickle!
I plan to find a recipe for dill and sweet pickles so I can try to make those too! Problem is I can only eat so many pickles in a day! haha! So we will go slow on that, cause I am wanting to make some more of these now!
Oh one more thing! You notice Alton's pickles were just cut flat with no texture, so I was thinking I would use the fancy attachment on my mandolin, that is why you see my pickles with the grooves! You can cut them anyway you choose I guess, but since they are a bread and butter pickle, if you have a mandolin, I suggest using it... the pickles also stay on a hamburger better with the grooves!
Enjoy!
Pecans & Pretzels
Hi everyone! Today we will be changing it up a bit and talking about food instead of making your own cleaning products! I want to do both in this blog, as I like to make my own homemade condiments and enjoy the more flavorful taste, the healthier choice of knowing what is in my sauces, and to get away from SOY... if you read about it you will never want to eat it!
Okay the world is full of things we shouldn't be eating now, but hey that's progress right? Alright, so I usually will try to save money and make things from scratch, but these are so good and so easy I just have to share! Ok my sister's neighbor makes these all the time and they are sooooo good... you won't want to stop eating them! As long as you are not allergic to nuts that is! haha! No need to be putting people into shock here!
Ok as long as you can eat PRETZELS, ROLOS and PECANS.. you can make this recipe! Yep, just those three items!
Here is what you need:
Ingredients:
1 bag of Snyder's of Hanover SNAPS ( you won't use them all.. so you can snack on the rest)
1 bag of Rolos Candy - yes a bag, those little rolls will not do unless you want to limit your consumption. use as many Rolos as you want, the amount in the bag is your limit!
Pecans (one per Rolos Candy you have! )

Instructions:
Heat your oven up to 250°F

Unwrap and place ONE Rolos candy on each one... see I started already! Yeah the hardest and longest part of this whole recipe is to unwrap like 42 of these things! LOL!

Once you have a whole cookie sheet full of them, you just pop them into the hot oven and wait for about 1 to 1.5 minutes! You don't want to melt the ROLO you want to soften it.
Remove from the oven.
Place one PECAN on each Rolo and push down to get the Pecan to stick to the top and the Snap to stick to the bottom.

Let cool..
Store in the fridge so the don't get too soft. I suggest putting them in an airtight container with wax paper between the layers.. so they don't all stick to each other!
Last step: ENJOY!!!!
Not the healthiest thing to eat, but they make a great snack, kids love them and well so will you! Remember to limit yourself, it will be difficult, but at least share them with others! haha!
Until next time!
Okay the world is full of things we shouldn't be eating now, but hey that's progress right? Alright, so I usually will try to save money and make things from scratch, but these are so good and so easy I just have to share! Ok my sister's neighbor makes these all the time and they are sooooo good... you won't want to stop eating them! As long as you are not allergic to nuts that is! haha! No need to be putting people into shock here!
Ok as long as you can eat PRETZELS, ROLOS and PECANS.. you can make this recipe! Yep, just those three items!
Here is what you need:
Ingredients:
1 bag of Snyder's of Hanover SNAPS ( you won't use them all.. so you can snack on the rest)
1 bag of Rolos Candy - yes a bag, those little rolls will not do unless you want to limit your consumption. use as many Rolos as you want, the amount in the bag is your limit!
Pecans (one per Rolos Candy you have! )

Instructions:
Heat your oven up to 250°F
Take the SNAPS and lay them on a cookie sheet - I covered mine with parchment paper.

Unwrap and place ONE Rolos candy on each one... see I started already! Yeah the hardest and longest part of this whole recipe is to unwrap like 42 of these things! LOL!

Once you have a whole cookie sheet full of them, you just pop them into the hot oven and wait for about 1 to 1.5 minutes! You don't want to melt the ROLO you want to soften it.
Remove from the oven.
Place one PECAN on each Rolo and push down to get the Pecan to stick to the top and the Snap to stick to the bottom.

Store in the fridge so the don't get too soft. I suggest putting them in an airtight container with wax paper between the layers.. so they don't all stick to each other!
Last step: ENJOY!!!!
Not the healthiest thing to eat, but they make a great snack, kids love them and well so will you! Remember to limit yourself, it will be difficult, but at least share them with others! haha!
Until next time!
Subscribe to:
Posts (Atom)


